


Power-up
EXAMPLE - DRAGON BALL POWER UP
STEP 1
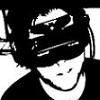
Open Image : Image Example

STEP 2
Create New Layer - Press ctrl+shift+n
STEP 3
Choose Brush. It's in default photoshop set:

STEP 4
Paint something like this :

STEP 5
Change opacity of this layer to 30% a open blending options. add outer glow (orange) and color overlay (yellow). leave default settings:

STEP 6
Now repeat steps 2-5, just draw diffrent white shapes on the beginning and change opacity do 20%:

STEP 7
Switch to imageready - To do this, click ctrl+shift+m
STEP 8
Duplicate currect frame. select 1st one and set two layers with auras to visible. select 2nd frame and hide layer with 30% opacity (u have two - with 30 and 20)
STEP 9
click the "Tween" buttn and type "1" next to "Frame to Add". now frames should be set as here:
1 - Visible two layers
2 - Visible layer with 30% opacity
3 - Visible layer with 20% opacity
Change delay of 1st frame to 0.1. animation should be fine now:

STEP 10
Click ctrl+shift+m again. duplicate layer with goten (this boy) and choose smudge tool (with 100% strenght and medium-sized brush)
Smudge A BIT hair and clothes (like the wind would lift 'em)
STEP 11
Get back to imageready (ctrl+shift+m) and set this layer visible only on 1st frame.
Ready. animation should looks like here now:


